How to Play the Dragon Ball Super Card Game
Power up, charge your energy, and go Super Saiyan at the card table. Everything you need to know about the DBS TCG — from your first Kamehameha to your first victory.
What You'll Need to Get Started
The Dragon Ball Super Card Game keeps things lean. You don't need a mountain of accessories — just a deck, a mate to battle, and the burning desire to shout attack names across a table.
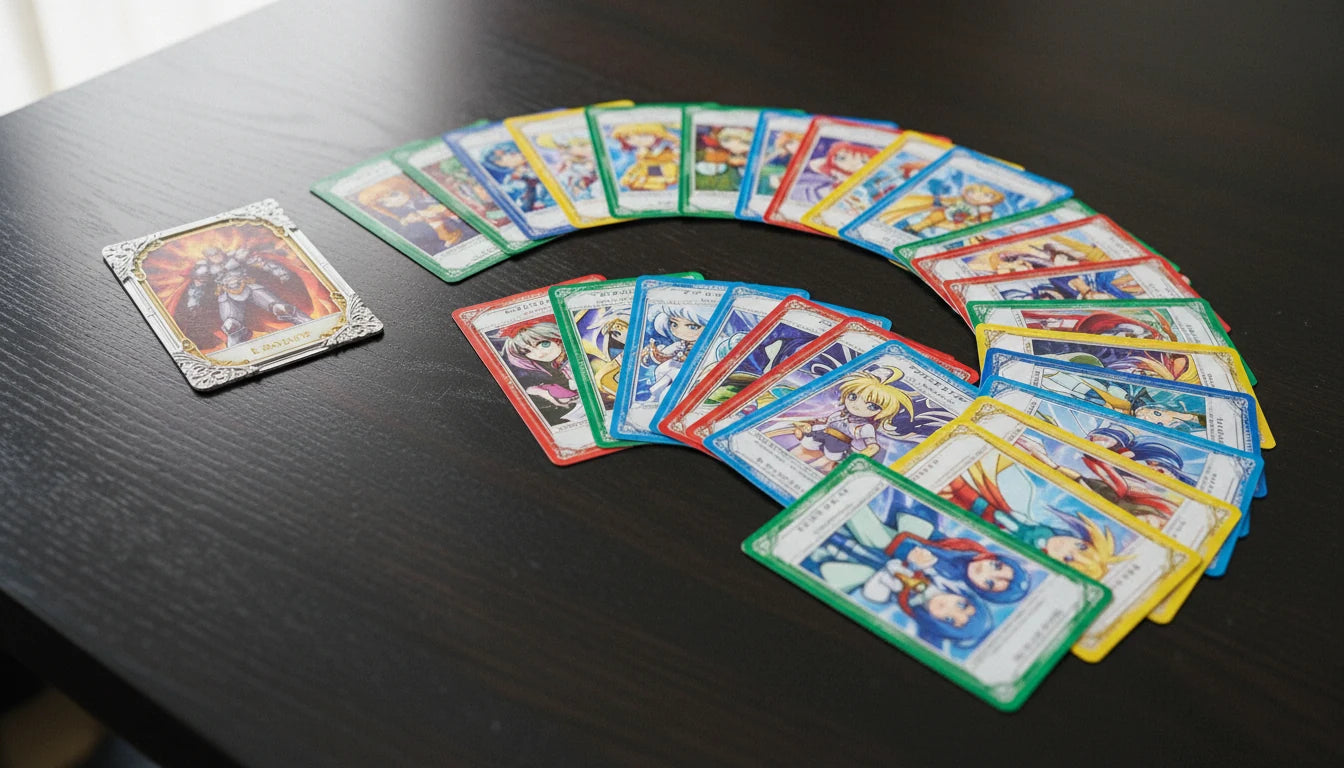
- A 50-card deck + 1 Leader Card — Starter Decks come pre-built and ready to play straight out of the box. Your Leader sits separately from the main deck.
- A life area — you'll set 8 cards from your deck face-down as your life cards during setup. No extra tokens needed, your deck does double duty.
- Counters or tokens (optional) — handy for tracking markers and effects, but not strictly essential for casual play.
- An opponent — find a fellow Saiyan, challenge a friend, or rock up to your local game shop's DBS night. Just be prepared for trash talk.
Pro Tip
Starter Decks are brilliant value for new players. They include a Leader Card, a 50-card deck, and a rules guide. Grab two different Starter Decks and you've got everything for two people to play right away — proper budget-friendly way to learn the game.
The Card Types
Every card in the DBS Card Game falls into one of four main categories. Think of it like assembling your Z-Fighter squad — your Leader calls the shots, and everything else supports the mission.
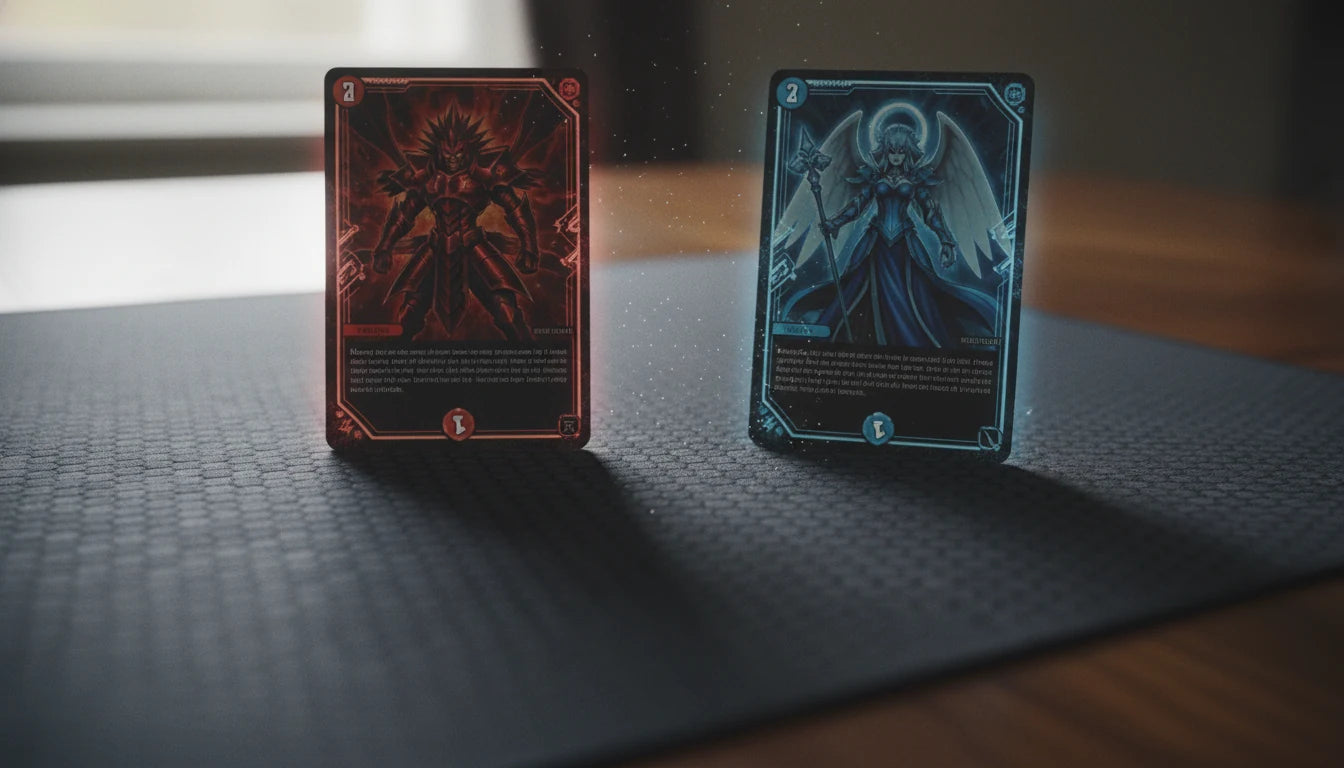
Leader Cards
Your commander. Always in play from the start. Has a front side and an Awakened back side — flip it when your life gets low for a massive power boost.
Battle Cards
Your fighters. Play them from your hand by paying their energy cost. They attack, defend, and combo to swing the tide of battle.
Extra Cards
One-shot effects. Play them, resolve the ability, and they go to the Drop Area. Think of them as your Senzu Beans and Spirit Bombs.
The core card types: Leader (left), Battle (centre), Extra (right)
Unison Cards
Unison Cards are a special type that arrived later in the game's life. They sit in the Battle Area like Battle Cards, but work differently — they have markers placed on them and you remove markers to activate powerful abilities. Think of them as allies who show up to lend a hand (or a Final Flash). You can only have one Unison Card in play at a time, and your opponent can choose to attack it instead of your Leader.
Good to Know
Unison Cards aren't essential for your first few games. Focus on Leaders, Battle Cards, and Extras first. Once you're comfortable with the basics, Unison Cards add a brilliant extra layer of strategy.
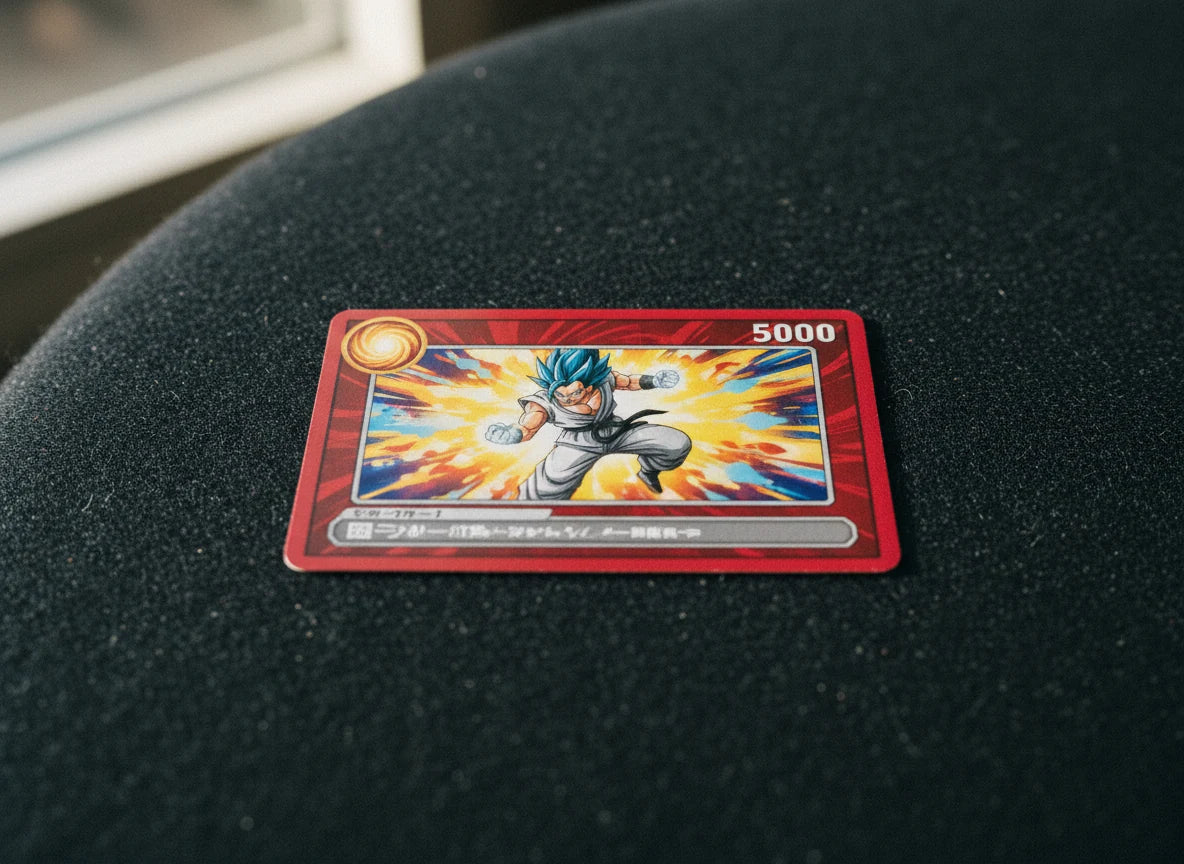
Reading a DBS Card
DBS cards are packed with information, but once you know where to look, it all clicks into place. Here's a breakdown of what every part of a card means — your power-level scouter for the card table.
Anatomy of a DBS card — every section explained
- Energy Cost — top-left corner. The number of energy you need to rest (tap) to play this card. A cost of 4 means you rest 4 energy cards.
- Specified Cost — some energy in the cost must be a specific colour. If a card costs 3 with 1 red specified, you need at least 1 red energy among the 3 you rest.
- Power — the card's strength in battle. Shown as a number like 15000 or 20000. Higher power wins fights. Yes, power levels DO matter here.
- Combo Power — the bonus power this card adds when played as a Combo during battle. Usually +5000 or +10000.
- Combo Cost — some cards cost energy to use as a Combo. Cards with 0 combo cost can be comboed for free from your hand.
- Colour — indicated by the card's border and energy cost symbols. Red, Blue, Green, Yellow, Black, or multicolour.
- Skills / Abilities — keyword abilities and text effects printed on the card. These are the special moves that make each card unique.
- Era — flavour-based grouping (Saiyan Saga, Frieza Saga, etc.). Some card effects reference specific eras.
- Character Name — top of the card. Remember, you can have up to 4 copies of any card with the same card name in your deck.
Common Mistake
Don't confuse Energy Cost with Combo Cost. Energy Cost is what you pay to play the card onto the field. Combo Cost is what you pay to use it as a power boost during battle. Two completely different things — getting them mixed up will cost you games.
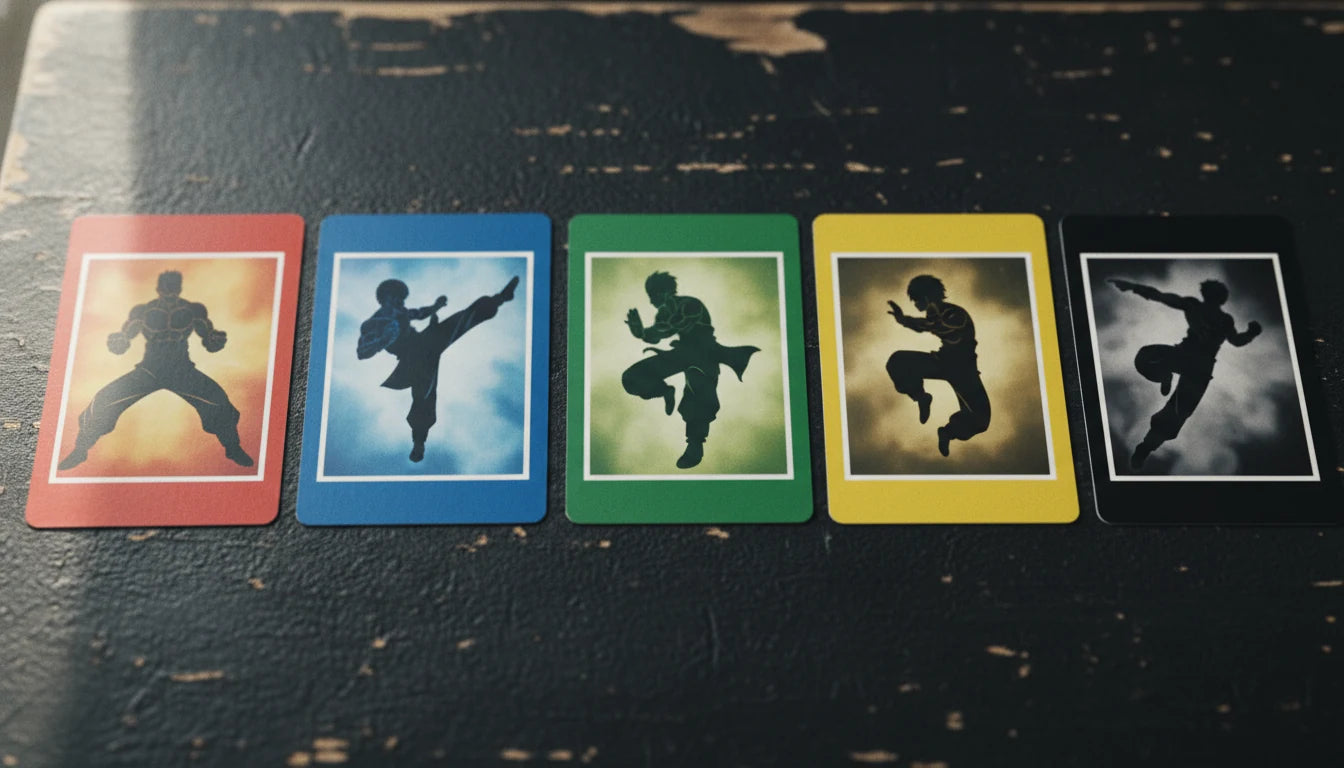
The Colour System
Colours in the DBS Card Game aren't just for aesthetics — each colour has a distinct playstyle and personality. Choosing your colour is like choosing your fighting style. Are you a full-throttle Goku or a calculating Frieza?
The colour identities — each plays completely differently
| Colour | Playstyle | Strengths |
|---|---|---|
| 🔴 Red | Aggressive, all-out offence | High power, fast attacks, overwhelming pressure. Hit hard, ask questions later — pure Saiyan energy. |
| 🔵 Blue | Defensive, card advantage | Draw power, hand control, bouncing cards back. Outthink your opponent and drown them in card advantage. |
| 🟢 Green | Ramp and big plays | Extra energy generation, playing massive cards early. Green wants to cheat the energy curve and drop bombs ahead of schedule. |
| 🟡 Yellow | Defensive, life manipulation | Life manipulation, negating attacks, healing. Yellow turns your life cards into a resource and punishes aggressive opponents. |
| ⚫ Black | Removal, control, Xeno | Destroying opponent's cards, disruption, the Dark Demon Realm. Black picks apart your opponent's board piece by piece. |
| 🌈 Multicolour | Flexible, powerful | Combines strengths from multiple colours. Usually requires mixed-colour energy to play, but the payoff is worth it. |
Pro Tip
Starting out? Red is the simplest colour to learn because the strategy is straightforward — play big things, hit face. Once you're comfortable, branch into Blue or Green for more nuanced gameplay.
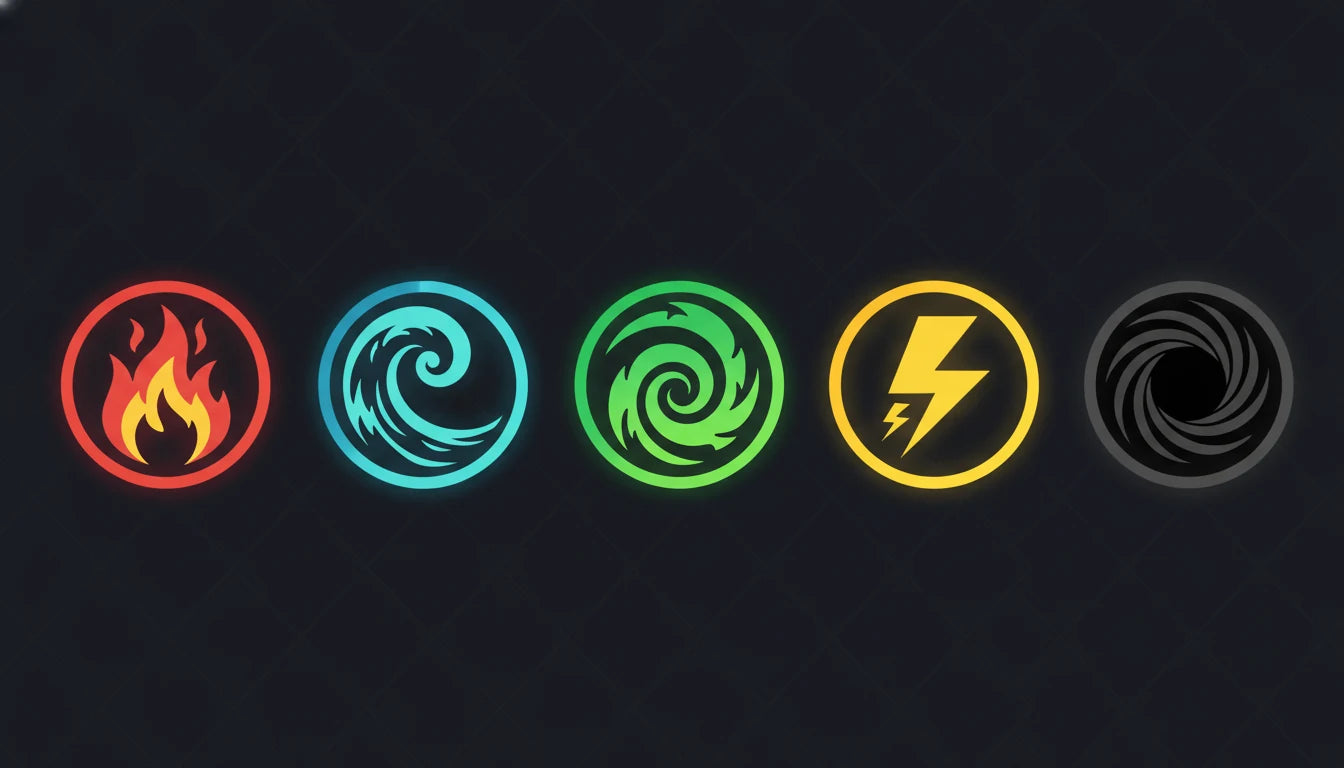
The Energy System
Energy is the fuel that powers everything in the DBS Card Game. Unlike some card games where you have dedicated resource cards, here any card from your hand can become energy. That's right — every card in your hand has a dual purpose. It's elegant and it means every decision matters.
- Charging energy — during your Charge Phase, you may place one card from your hand face-up into your Energy Area. That card is now energy. It stays there for the rest of the game.
- Active vs Rest — energy cards start active (upright). When you pay a cost, you rest them (turn sideways). At the start of your turn, all your energy switches back to active. Sound familiar? It's similar to tapping in other card games.
- Colour matters — some cards require specific-colour energy. If a Battle Card costs 2 with 1 Blue specified, you need at least 1 Blue energy among the cards you rest.
- Choosing what to charge — this is where it gets tactical. Every card you charge is a card you can't play later. Charge too aggressively and you'll run out of fighters. Charge too cautiously and you won't have enough energy to play your heavy hitters.
Watch Out
Once a card is in your Energy Area, it stays there. You can't take it back into your hand (unless a specific card effect lets you). Think carefully before you charge — that Goku you charged on turn 2 might have been the card you needed on turn 5.
Setting Up the Game
Setup is quick and snappy — you'll be throwing punches inside a couple of minutes. Here's how to go from shuffled deck to battle-ready:
Place Your Leader Card
Put your Leader Card face-up in the Leader Area with its front side showing. This is your main fighter — it stays in play for the entire game. Choose wisely, because your Leader defines your deck's strategy.
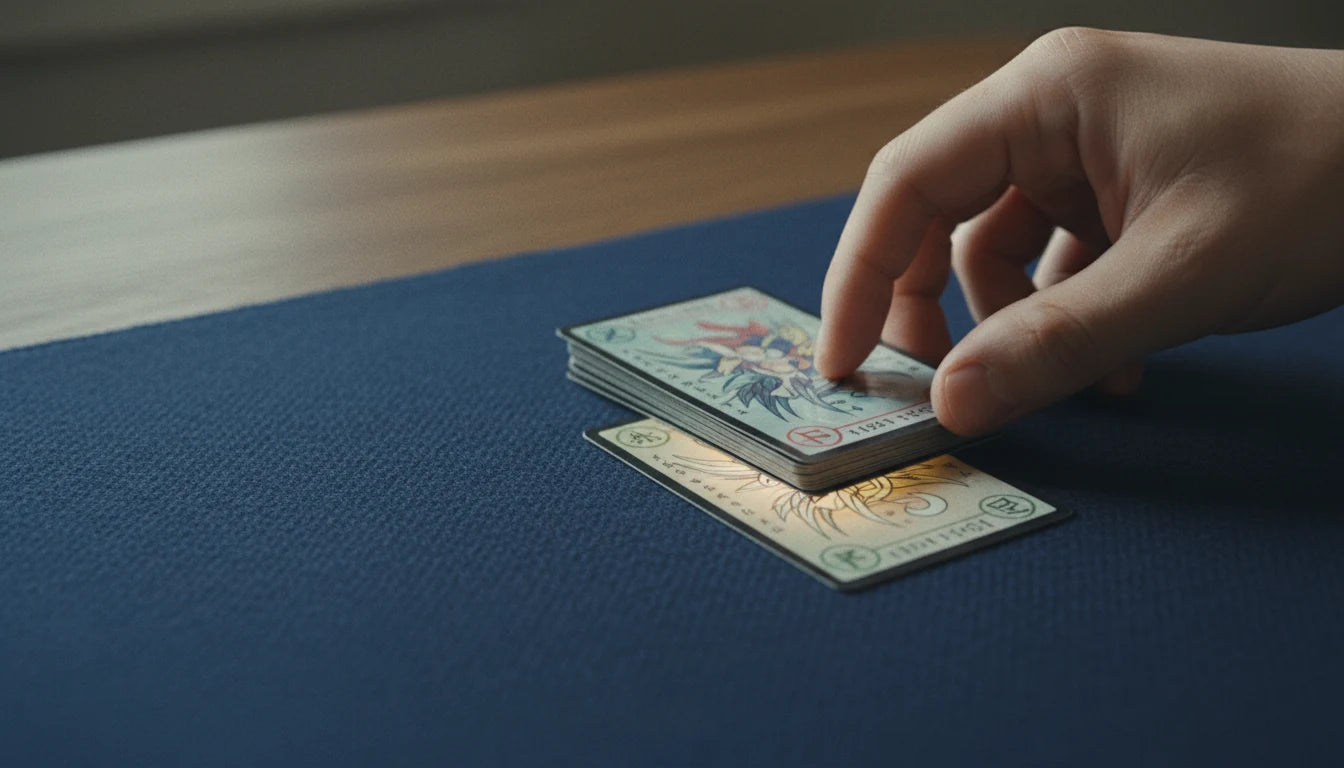
Shuffle & Draw 6
Shuffle your 50-card deck thoroughly and draw 6 cards. This is your opening hand. Have a look, plan your strategy, and try not to grin if you've drawn perfectly.
Set Your Life Cards
Take the top 8 cards of your deck and place them face-down in your Life Area. These are your life points — when you take damage, you'll add life cards to your hand. When they're all gone and you take another hit, it's game over.
Energy Area Starts Empty
Your Energy Area begins completely empty. You'll build it up over the course of the game by charging cards from your hand during your Charge Phase. No freebies here.
Decide Who Goes First
Use rock-paper-scissors, flip a coin, or settle it with a staring contest. The player who goes first cannot draw a card on their first turn and cannot attack. Going second gives you an extra card and the ability to swing immediately.
Mulligan (Optional)
Don't like your hand? You get one free mulligan. Shuffle your entire hand back into the deck and draw the same number of cards. You can only do this once, so make it count.
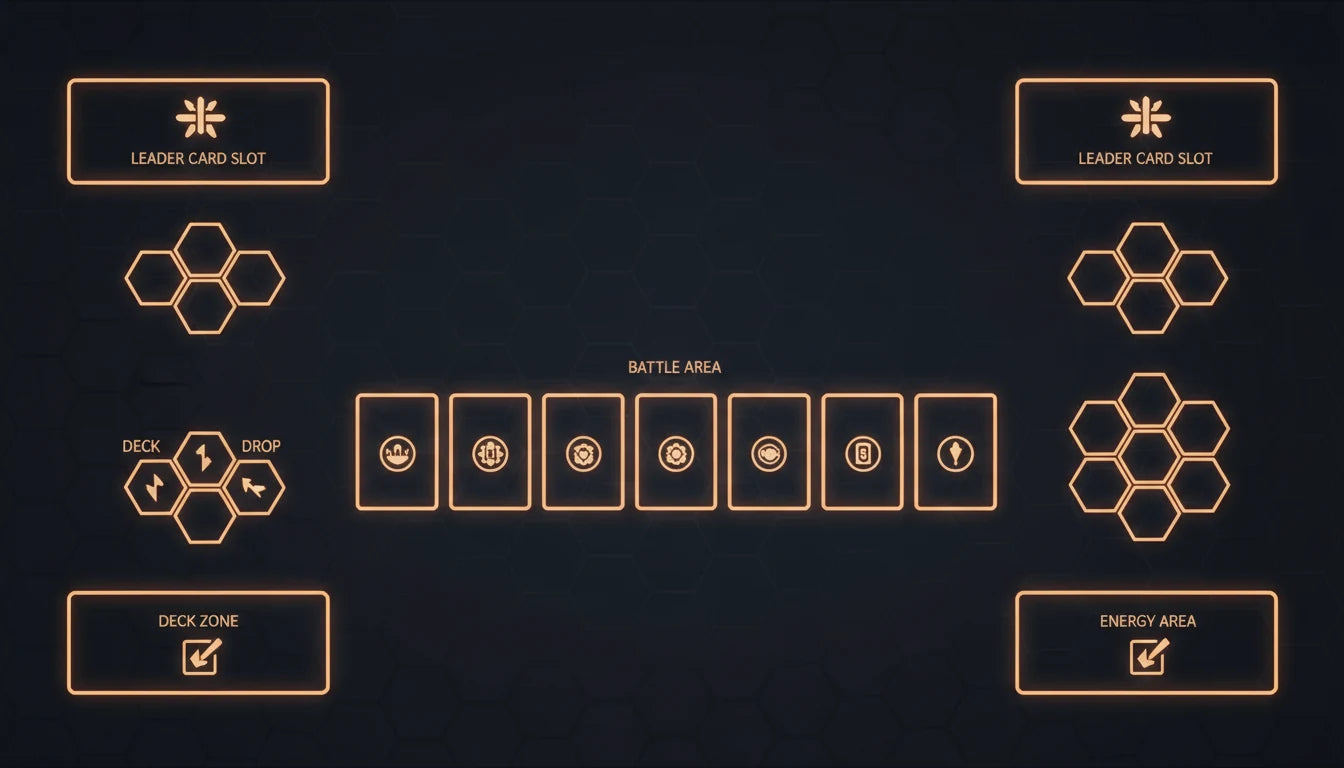
The playing field — where everything goes
Good to Know
The Drop Area is the DBS discard pile. Whenever a Battle Card is KO'd, an Extra Card resolves, or you combo a card, it goes to the Drop Area. Some cards interact with the Drop Area, so keep it tidy and visible.
What You Do on Your Turn
Each turn in the DBS Card Game flows through a clear set of phases. Once you've done it a few times, it becomes second nature — like muscle memory for card games.
1. Charge Phase
At the start of your turn, all your rested energy switches back to active (untaps). Then you may place one card from your hand face-up into your Energy Area. This is how you build up resources to play bigger cards on later turns. You don't have to charge if you don't want to, but you usually should.
2. Draw Phase
Draw one card from your deck. Simple. (Remember: the first player skips this on their very first turn.)
3. Main Phase
This is where the action happens. During your Main Phase, you can do any of the following in any order:
- Play Battle Cards — pay their energy cost by resting the appropriate energy, then place them in your Battle Area. They're ready to attack this turn.
- Play Extra Cards — pay the cost, resolve the effect, then send the card to the Drop Area.
- Attack with your Leader or Battle Cards — declare attacks against your opponent's Leader or their Battle Cards (more on this in the Battle section).
- Activate skills — some cards have activated abilities you can use during your Main Phase.
Pro Tip
Play your Battle Cards before you start attacking. Cards in the Battle Area can be used as attackers right away — there's no summoning sickness in DBS. Get your board set up, then unleash everything at once.
Battle & the Combo System
Battles in the DBS Card Game are fast, furious, and full of dramatic reversals — exactly what you'd expect from a Dragon Ball game. The Combo system is what makes this game truly special. Every card in your hand is a potential power boost, which means the fight is never truly over until the final power levels are compared.
Battle is all about power — attack, defend, combo, and see whose level comes out on top
How to Attack
- Choose your attacker — pick an active (untapped) Leader or Battle Card. Rest it (turn sideways) to declare an attack.
- Choose your target — you can attack your opponent's Leader or any of their rested Battle Cards. You cannot attack active Battle Cards (they're guarding).
- Attacker combos — after declaring, you can play cards from your hand as Combo cards to boost your attacker's power. Pay any combo costs and add the Combo Power to your total.
- Defender combos — your opponent can then play their own Combo cards to boost their defender's power. This is the back-and-forth that makes battles electric.
- Compare power — if the attacker's total power is greater than or equal to the defender's, the attack hits. If the defender's power is higher, the attack fails.
The Combo system — every card in your hand can turn the tide of battle
What Happens When an Attack Hits
- Hit a Leader — the defending player takes one card from their Life Area and adds it to their hand. Yes, taking damage actually gives you more cards — it's the game's built-in comeback mechanic. Life cards with the Awakening symbol trigger their effects when taken as damage.
- Hit a Battle Card — if the attack's power is equal to or greater than the Battle Card's power, that Battle Card is KO'd and sent to the Drop Area.
Watch Out
Attacking isn't free. Every time you rest a card to attack, it can't defend until your next turn. Overcommitting to offence leaves you wide open. Balance aggression with keeping some cards active for defence.
Awakening — Your Comeback Moment
This is the mechanic that captures the spirit of Dragon Ball perfectly. When your back is against the wall and things look dire, your Leader powers up. It's your Super Saiyan transformation moment, and it's genuinely thrilling every single time.
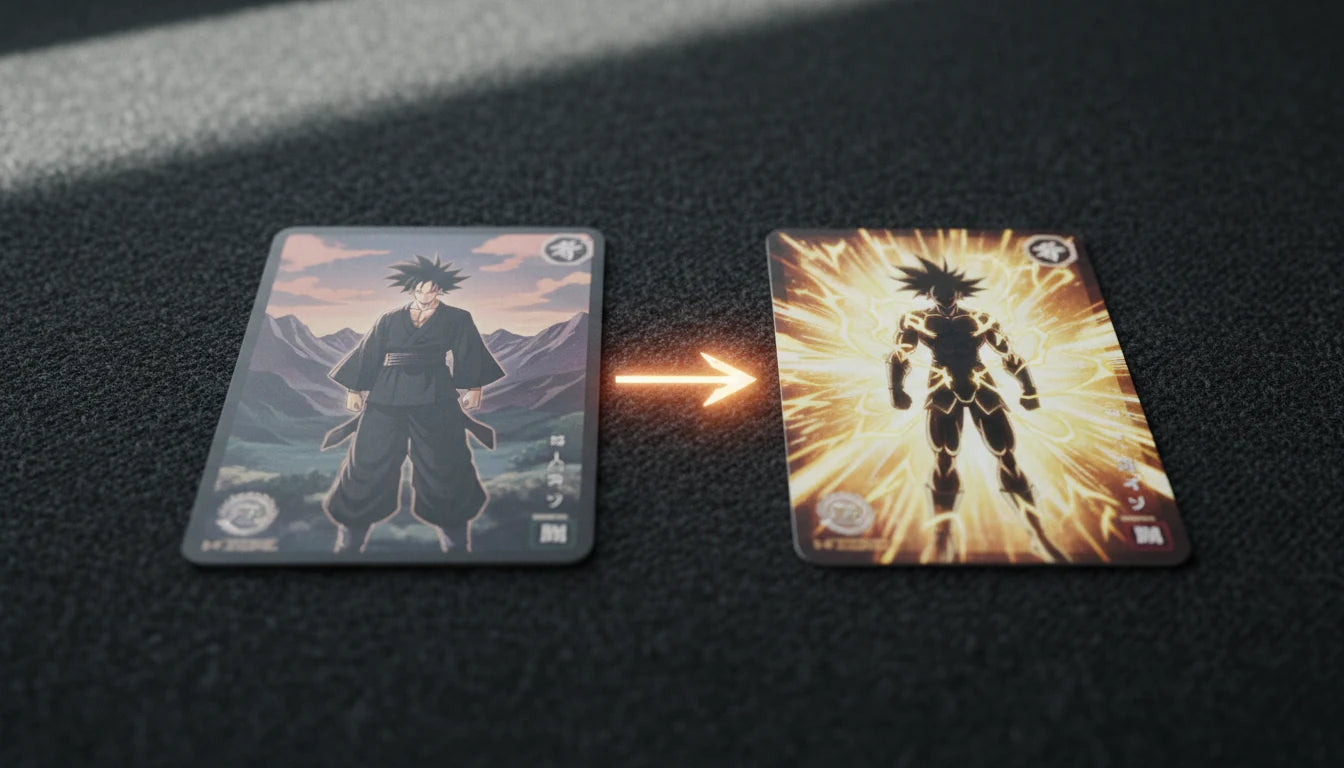
When life drops to 4 or less, your Leader Awakens — flipping to its far more powerful back side
- When does it happen? — when your life drops to 4 or fewer cards, you can flip your Leader Card to its Awakened side. This is optional on your turn, but mandatory triggers on some Leaders may vary.
- What changes? — the Awakened side typically has higher power, better abilities, and sometimes even a completely different skill set. It's a straight upgrade.
- Draw bonus — most Awakened Leaders let you draw cards when they flip, giving you a fresh burst of resources exactly when you need them most.
- It only happens once — once Awakened, your Leader stays in that form for the rest of the game. No going back.
Pro Tip
Don't panic when your life total drops — in DBS, losing life is part of the strategy. Each life card you lose goes to your hand, giving you more resources and more Combo options. A player at 4 life often has a bigger hand and more options than someone at 8. The game rewards coming from behind, and Awakening is the ultimate expression of that.
Key Mechanics to Know
Beyond the core rules, DBS has several keyword abilities and special mechanics that crop up regularly. You don't need to memorise all of these before your first game, but knowing what they do will help you read cards confidently.
| Keyword | What It Does |
|---|---|
| Double Strike | When this card's attack hits the Leader, the opponent loses 2 life instead of 1. Devastating. |
| Critical | When this card attacks, the life card taken by the opponent is placed in the Drop Area instead of their hand. They take damage but don't gain the extra card. |
| Blocker | Switch this card to rest mode to redirect an attack to it. Your emergency bodyguard. |
| Barrier | This card cannot be chosen by your opponent's skills. It can still be attacked, but it's immune to targeted removal. |
| Dual Attack | This card can attack twice per turn. Rest it, untap it, rest it again. Twice the punches. |
| Over Realm | Play this card by removing cards in your Drop Area from the game instead of paying energy. The card gets removed at end of turn. High-risk, high-reward plays from the grave. |
| Evolve | Play this card on top of a specified Battle Card already in play, usually at a reduced cost. Think of it as a transformation mid-battle. |
| Union-Potara / Union-Fusion | Special summoning mechanics where multiple cards fuse together into one powerful card. Exactly as epic as it sounds. |
| Deflect | This card cannot be countered when played. It hits the field no matter what. |
| Alliance | Combines the power of multiple attacking cards into one massive strike. Teamwork makes the dream work. |
Good to Know
Over Realm deserves special attention. It lets you play cards by removing cards from your Drop Area (discard pile) from the game entirely. The card you play with Over Realm gets removed at the end of your turn, so it's a temporary but often game-swinging play. Build up your Drop Area through combos and KO'd cards, then unleash an Over Realm bomb when the moment is right.
How to Win the Game
Winning in the DBS Card Game requires you to deliver the finishing blow. It's not enough to just whittle your opponent's life down — you need to land that final, unblockable hit. Proper anime finale energy.
Deliver the Final Blow
Reduce your opponent's life to 0, then land one more successful attack on their Leader. If they can't defend it, the game is over. Total victory.
Deck Out
If your opponent can't draw a card when they're required to, they lose. It's rare, but grinding through someone's deck is a legitimate strategy.
Never Give Up
The Awakening and Combo systems mean no game is truly lost until the final blow lands. The deeper you dig, the stronger you get.
Good to Know
When your opponent has 0 life remaining, they're not out yet. They must take one more attack they cannot fully defend. If they can combo enough power to survive that final hit, the game continues. It's incredibly tense and makes every game feel like a proper Dragon Ball showdown.
Building Your First Deck
Once you've played a few games with a Starter Deck and you're ready to build your own, here are the rules and guidelines to get you sorted.
A solid deck — Leader up front, 50 cards built around a clear game plan
- Exactly 50 cards + 1 Leader — your main deck must be exactly 50 cards. Your Leader Card sits outside the deck in its own zone.
- Max 4 copies of any card — you can't run more than 4 copies of any card with the same name in your deck.
- Stick to 1-2 colours — your Leader determines your primary colour. Single-colour decks are the most consistent. Dual-colour decks work if your Leader supports it, but going wider than that gets messy fast.
- Low-cost cards matter — you need cards you can play on turns 1-3 while your energy is building. Don't fill your deck with nothing but 7-cost powerhouses or you'll be sitting idle early on.
- Include plenty of combo cards — cards with 0 combo cost and +10000 combo power are gold. They're free to use during battle and swing fights massively. Aim for at least 12-16 of these.
- Have a game plan — decide what your deck wants to do. Aggro? Control? Midrange? Build every card choice around that plan.
Beginner's Shortcut
Buy a Starter Deck and upgrade it. Swap in a few powerful singles that support your Leader's strategy and you'll have a competitive deck without breaking the bank. The DBS community is brilliant for budget deck lists too — have a look online for upgrade guides for your specific Starter Deck.
Top Tips for New Players
Don't Fear Losing Life
This is the biggest mindset shift for new DBS players. Losing life gives you cards, and having more cards means more Combo power. A player at 3 life with a full hand is often in a stronger position than someone at 7 life with an empty hand. Embrace the damage.
Charge Wisely
Every card you put into energy is a card you can never play. Charge your least useful cards first — usually low-impact cards or off-colour extras. Never charge a card you might need later unless you're desperate for the energy.
Save Your Combo Cards
Don't blow all your Combo cards on the first attack. Keep some in hand for defence. If your opponent swings at you and you've got nothing to Combo with, you're taking free damage. Balance is key.
Know When to Awaken
Some players try to stay un-Awakened for as long as possible. Others deliberately take damage to Awaken early. Learn what your Leader's Awakened side does and plan around it. If the Awakened ability is incredible, sometimes taking damage early is the right play.
Attack Rested Cards First
If your opponent has rested Battle Cards, pick them off before going for the Leader. Removing threats from the board means they have fewer attackers next turn and less to Combo with on defence.
Read Your Cards Carefully
DBS cards often have specific timing windows and conditions. Skills might activate "when played," "when attacking," or "at the start of your turn." Missing a trigger or misreading a condition is the most common source of mistakes. Take your time early on.
Frequently Asked Questions
Ready to Power Up?
Browse our Dragon Ball Super Card Game products — from Starter Decks to the latest booster sets.
Shop Dragon Ball Super