How to Play the Cyberpunk TCG
Everything you need to know to jack into the official Cyberpunk Trading Card Game by WeirdCo — from your first Gig Die to becoming a Night City legend.
What You'll Need to Get Started
The Cyberpunk TCG is the first official trading card game built around CD PROJEKT RED's Cyberpunk universe, designed by WeirdCo. It throws the traditional health-points formula in the bin — instead of chipping away at HP, you're hustling for jobs, collecting dice, and stealing them off your rival. Here's the kit you need before sitting down to play:
- A Cyberpunk TCG deck — grab a Common Cyberdeck starter or a Netrunner Starter Set if you're brand new. Each one comes pre-built and ready to play out of the box.
- A set of six polyhedral dice — one each of d4, d6, d8, d10, d12 and d20. These are your Gig Dice and they're how you score in this game.
- Eddie tokens — coins, glass beads, custom credit chips… anything you can pile up. You'll be earning and spending these as currency every turn.
- A rival — find a friend, recruit a flatmate, or head down to your local game store on launch.
💡 Pro Tip
The Netrunner Starter Set is the best entry point if you're getting in fresh — it ships with two ready-to-play decks, a full set of Gig Dice, and a quick-start rules booklet. You and a mate can be playing inside ten minutes.
How to Win the Game
The whole game boils down to one number: six. Whoever's collected more Gigs than the other player is winning, and the first one to lock in six is the new Night City legend.
🏆 Win Condition
If you start one of your turns with 6 or more Gig Dice already in your Gig Area — before you take one from the Fixer — you win the game on the spot. It doesn't matter how you got them. Claimed from the Fixer, stolen in combat, both — six is six.
Each Gig Die in your Gig Area counts as one job done. Quantity is what matters here, not the value rolled — two scrappy little dice put you closer to victory than one fat d20.
💀 Loss Condition
If your deck hits zero cards, you lose immediately. Burn through your library too fast and your rival wins by default — keep one eye on the size of your deck at all times.
Overtime
If both players ever take a full turn without grabbing a Gig from the Fixer Area, the game shifts into overtime. From that moment on, the player holding the most Gig Dice wins instantly. Most games never reach that stage — combat is brutal and dice change hands fast — but it's worth knowing the rule exists.
The Playmat
There are seven zones to know, and each one does a specific job. Get these straight in your head and the rest of the rules click into place.
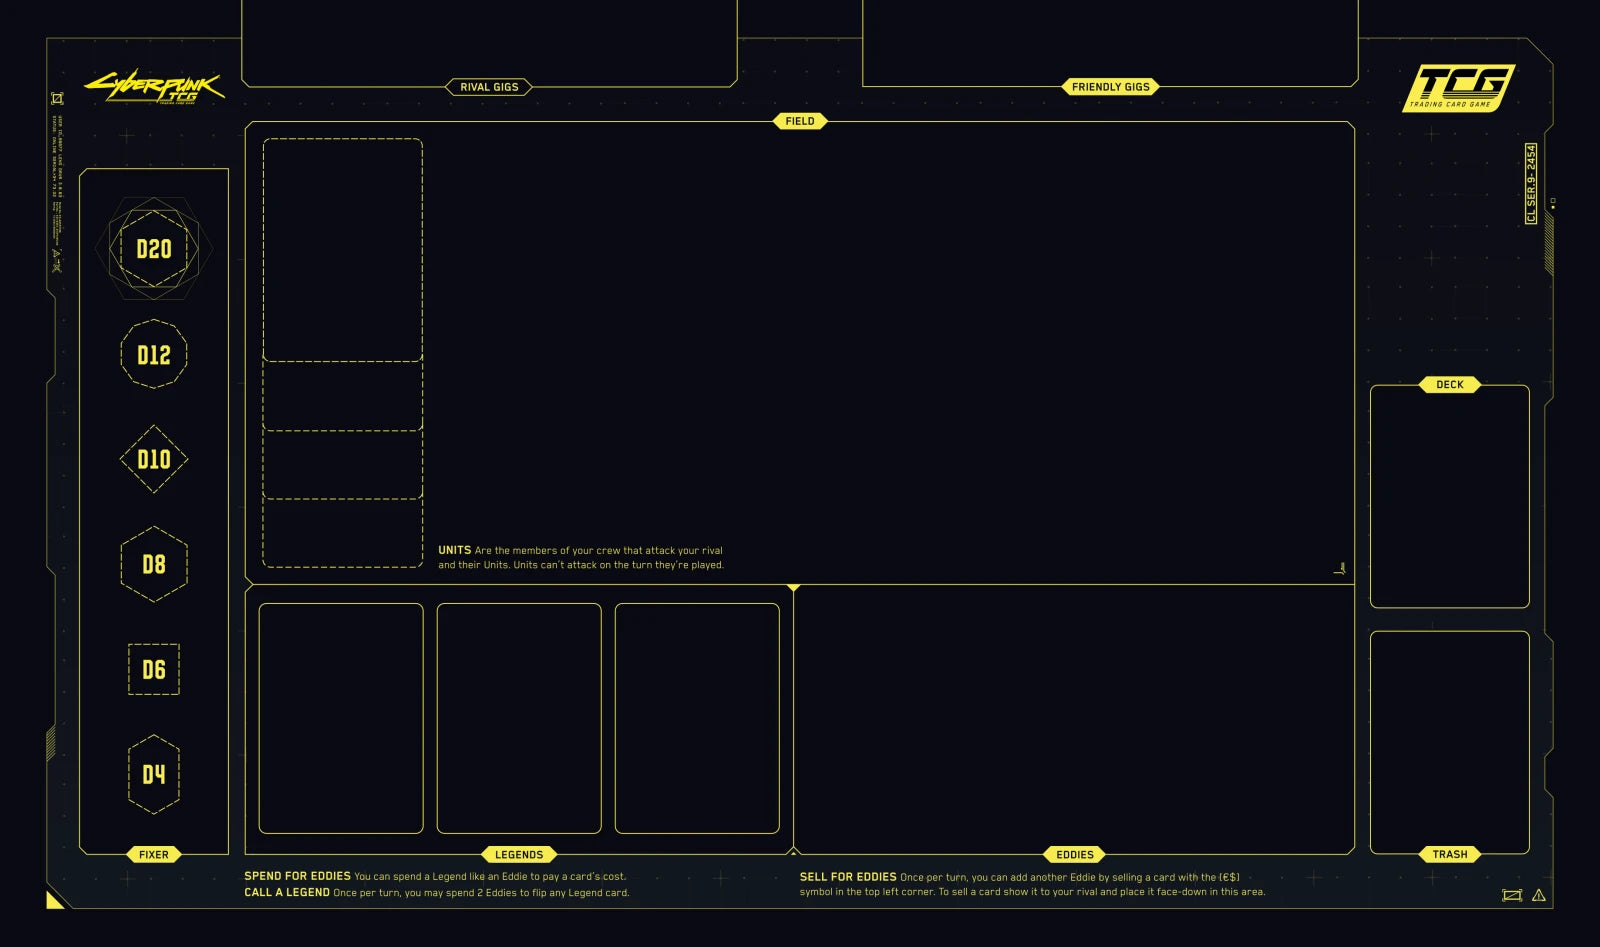
The official Cyberpunk TCG playmat layout
Fixer Area
All six of your Gig Dice live here at the start of the game — think of them as the open contracts a fixer's lined up for your crew. Every Ready Phase, after drawing, you take one die from this area, roll it, and shift it to your Gig Area. You can pick whichever die you fancy, but the d20 always has to be taken last.
Gig Area
This is where the jobs you've claimed — and any you've stolen off your rival — pile up. You win if you start your turn with six dice already sitting here. Some card effects also key off your Street Cred, which is just the total of all the face values showing on the dice in your Gig Area.
Field
Your Units sit here once you've played them. This is where every fight happens. When a Unit attacks, you spend it (turn it sideways) — meaning it can't act again until the start of your next turn.
Eddies Area
Every card has a cost in Eddies, shown in the top-left corner. This area starts the game completely empty — you fill it by selling cards out of your hand once per turn, with each sold card becoming one Eddie when you spend it.
Legends Area
Your three Legend cards sit here, face-down, in a random order. They're the named figures heading up your crew, each with a unique synergy effect. At any point you can spend a Legend (face-up or face-down) to pay one Eddie, or you can drop 2 Eddies to Call a Legend and flip it face-up — once per turn during your Play Phase, or once during your rival's attack as a defensive move.
Deck & Trash
Standard stuff. Your deck is your draw pile — top card comes off at the start of every turn. Your trash is the discard pile, where defeated Units, used Programs, and anything else that gets binned ends up.
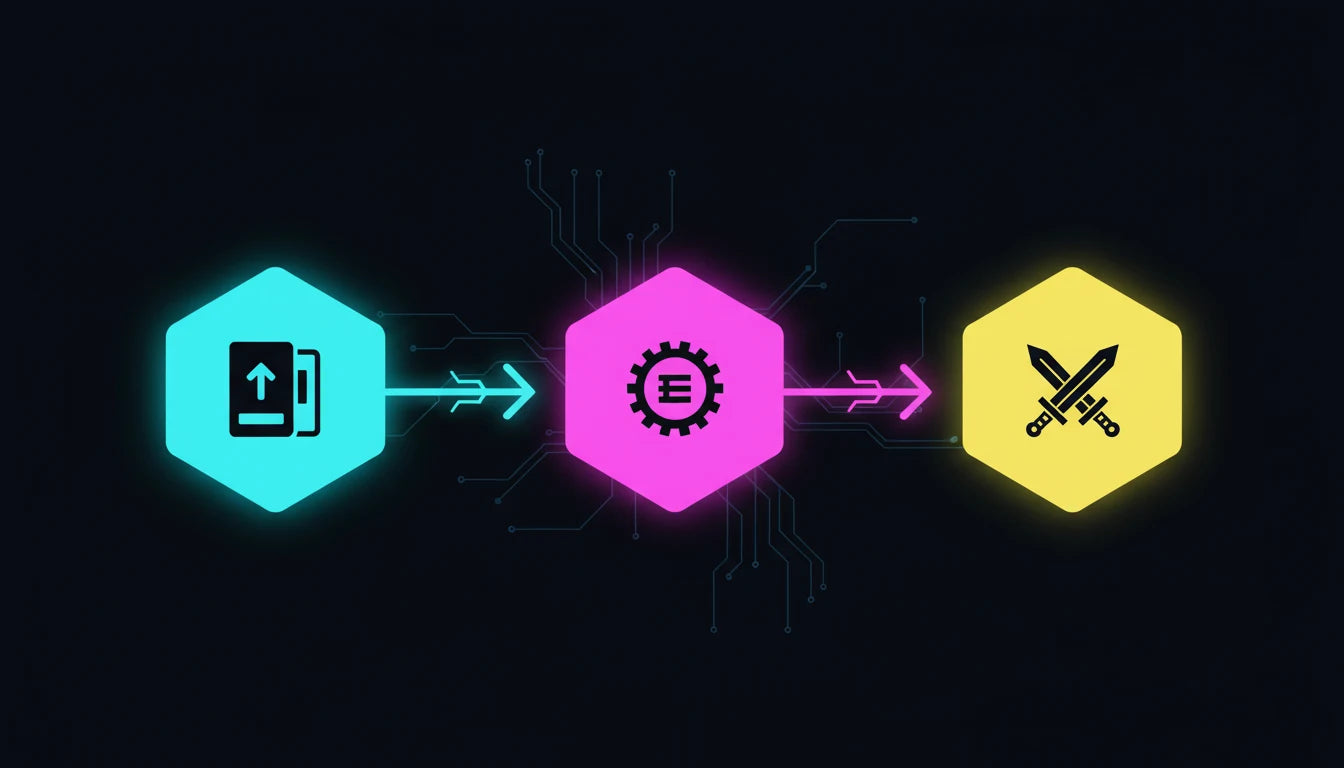
Reading Your Cards
There's a lot crammed onto every Cyberpunk TCG card, but once you know what you're looking at it becomes second nature. Here's the anatomy:
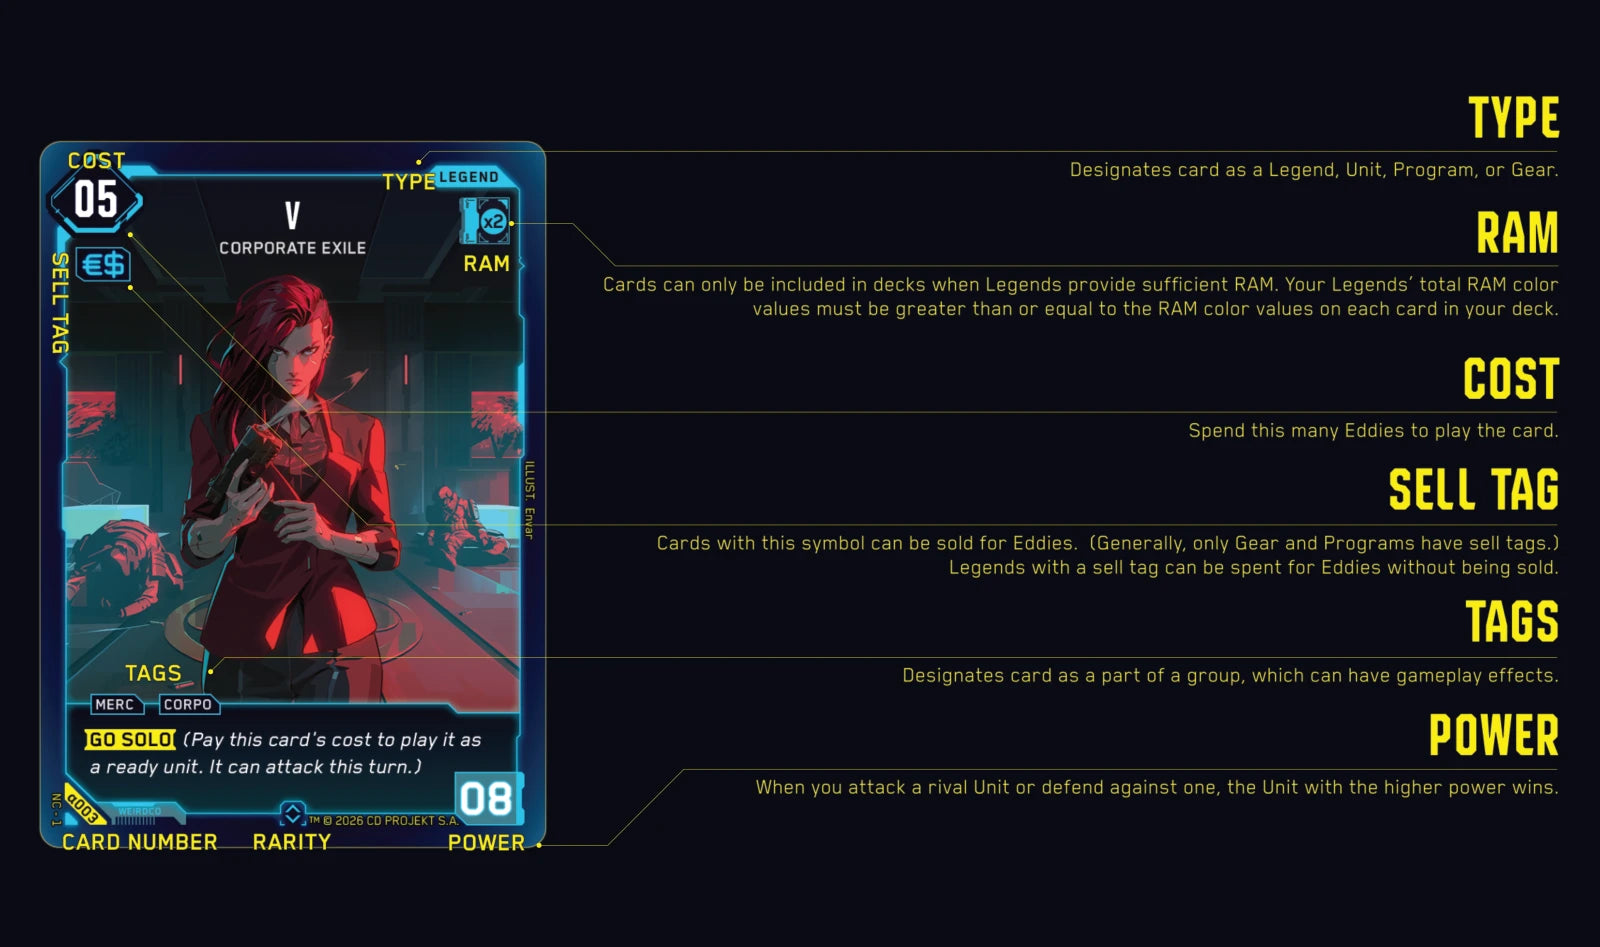
Anatomy of a Cyberpunk TCG card
- Cost — top-left number. The amount of Eddies you have to spend to play the card.
- Sell Tag (€$) — if a card has this symbol, it can be sold from your hand to generate one Eddie. Most Gear and Programs carry it; Legends always have it.
- Type — top-right label. Tells you whether the card is a Legend, Unit, Program or Gear.
- RAM — small coloured value next to the type. Used during deck building — your Legends set the maximum RAM you can run in each colour.
- Tags — group labels (Arasaka, Corpo, Mercs etc). Loads of cards reference tags in their effects.
- Power — bottom-right number, on Units only. Higher Power wins fights, and Power 10+ steals extra Gigs when you connect with a direct attack.
- Ability text — the rules text panel. This is where Timing Triggers and Keywords live.
The Four Card Types
Legends
The named leaders of your crew. Three per deck, all face-down at the start. Each one's a centrepiece with a unique effect.
Units
Your edgerunners. They live on the Field, attack rivals, and steal Gigs. They can't attack on the turn you play them.
Programs
One-shot effects. Pay the cost, resolve the effect, send the card to the trash. Playable any time during your Play Phase.
Gear
Equipment you bolt onto a friendly Unit. If that Unit ever leaves the Field, the Gear goes with it.
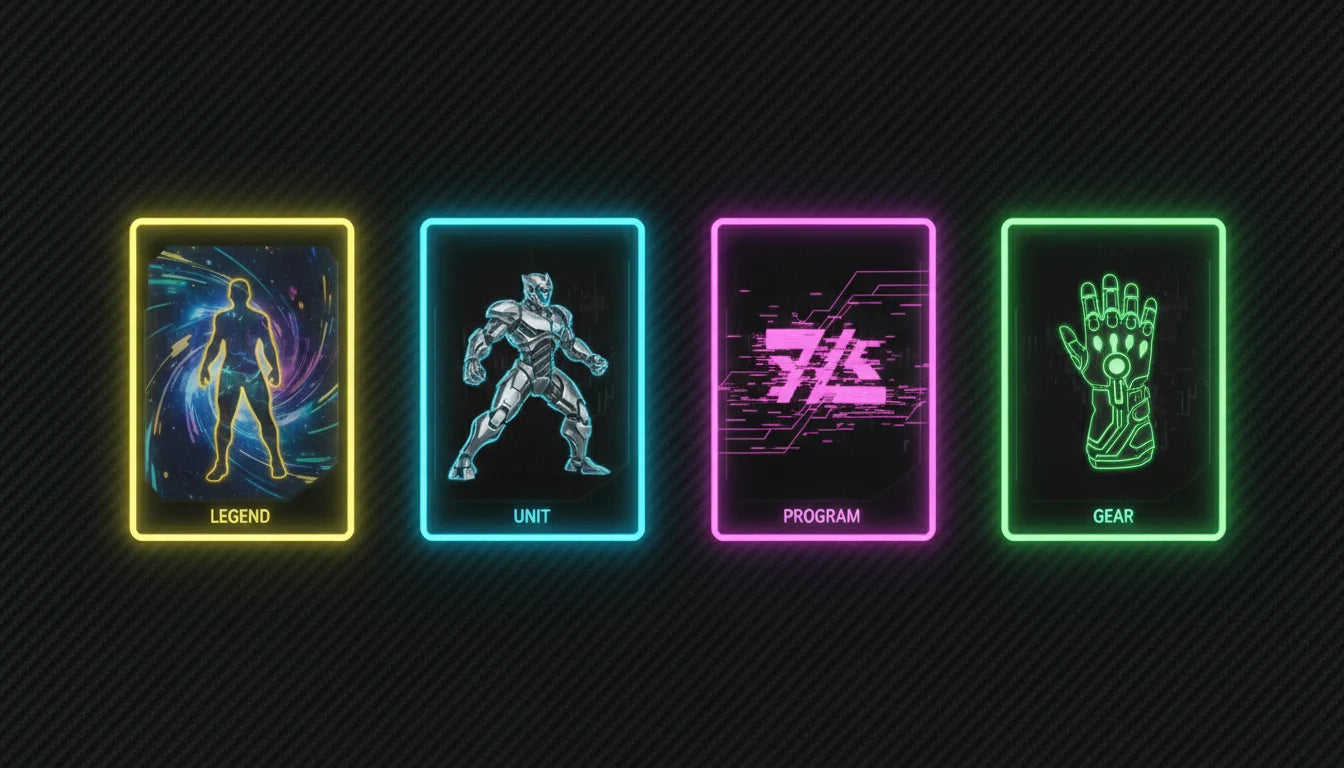
The four card types side by side
Timing Triggers
A Timing Trigger is a label in the ability text that tells you exactly when an effect happens. There are three to learn:
| Trigger | When It Fires |
|---|---|
| PLAY | The moment you finish paying a card's cost, the effect kicks in. |
| ATTACK | When the Unit declares an attack, before the fight resolves. |
| FLIP | The moment a Legend is flipped face-up. |
Keywords
Keywords are shorthand for an effect that shows up on lots of cards. There are two big ones in Set 1:
- BLOCKER — when a rival Unit attacks, you can spend this Unit to redirect the attack onto it instead. Saves a Gig Die at the cost of a Unit.
- GO SOLO — pay the listed cost to play the Unit ready, meaning it can attack the same turn it hits the table. Bypasses summoning sickness.
Example Legends
Here's what real Legend cards look like in the wild — three of the iconic faces from Welcome to Night City:
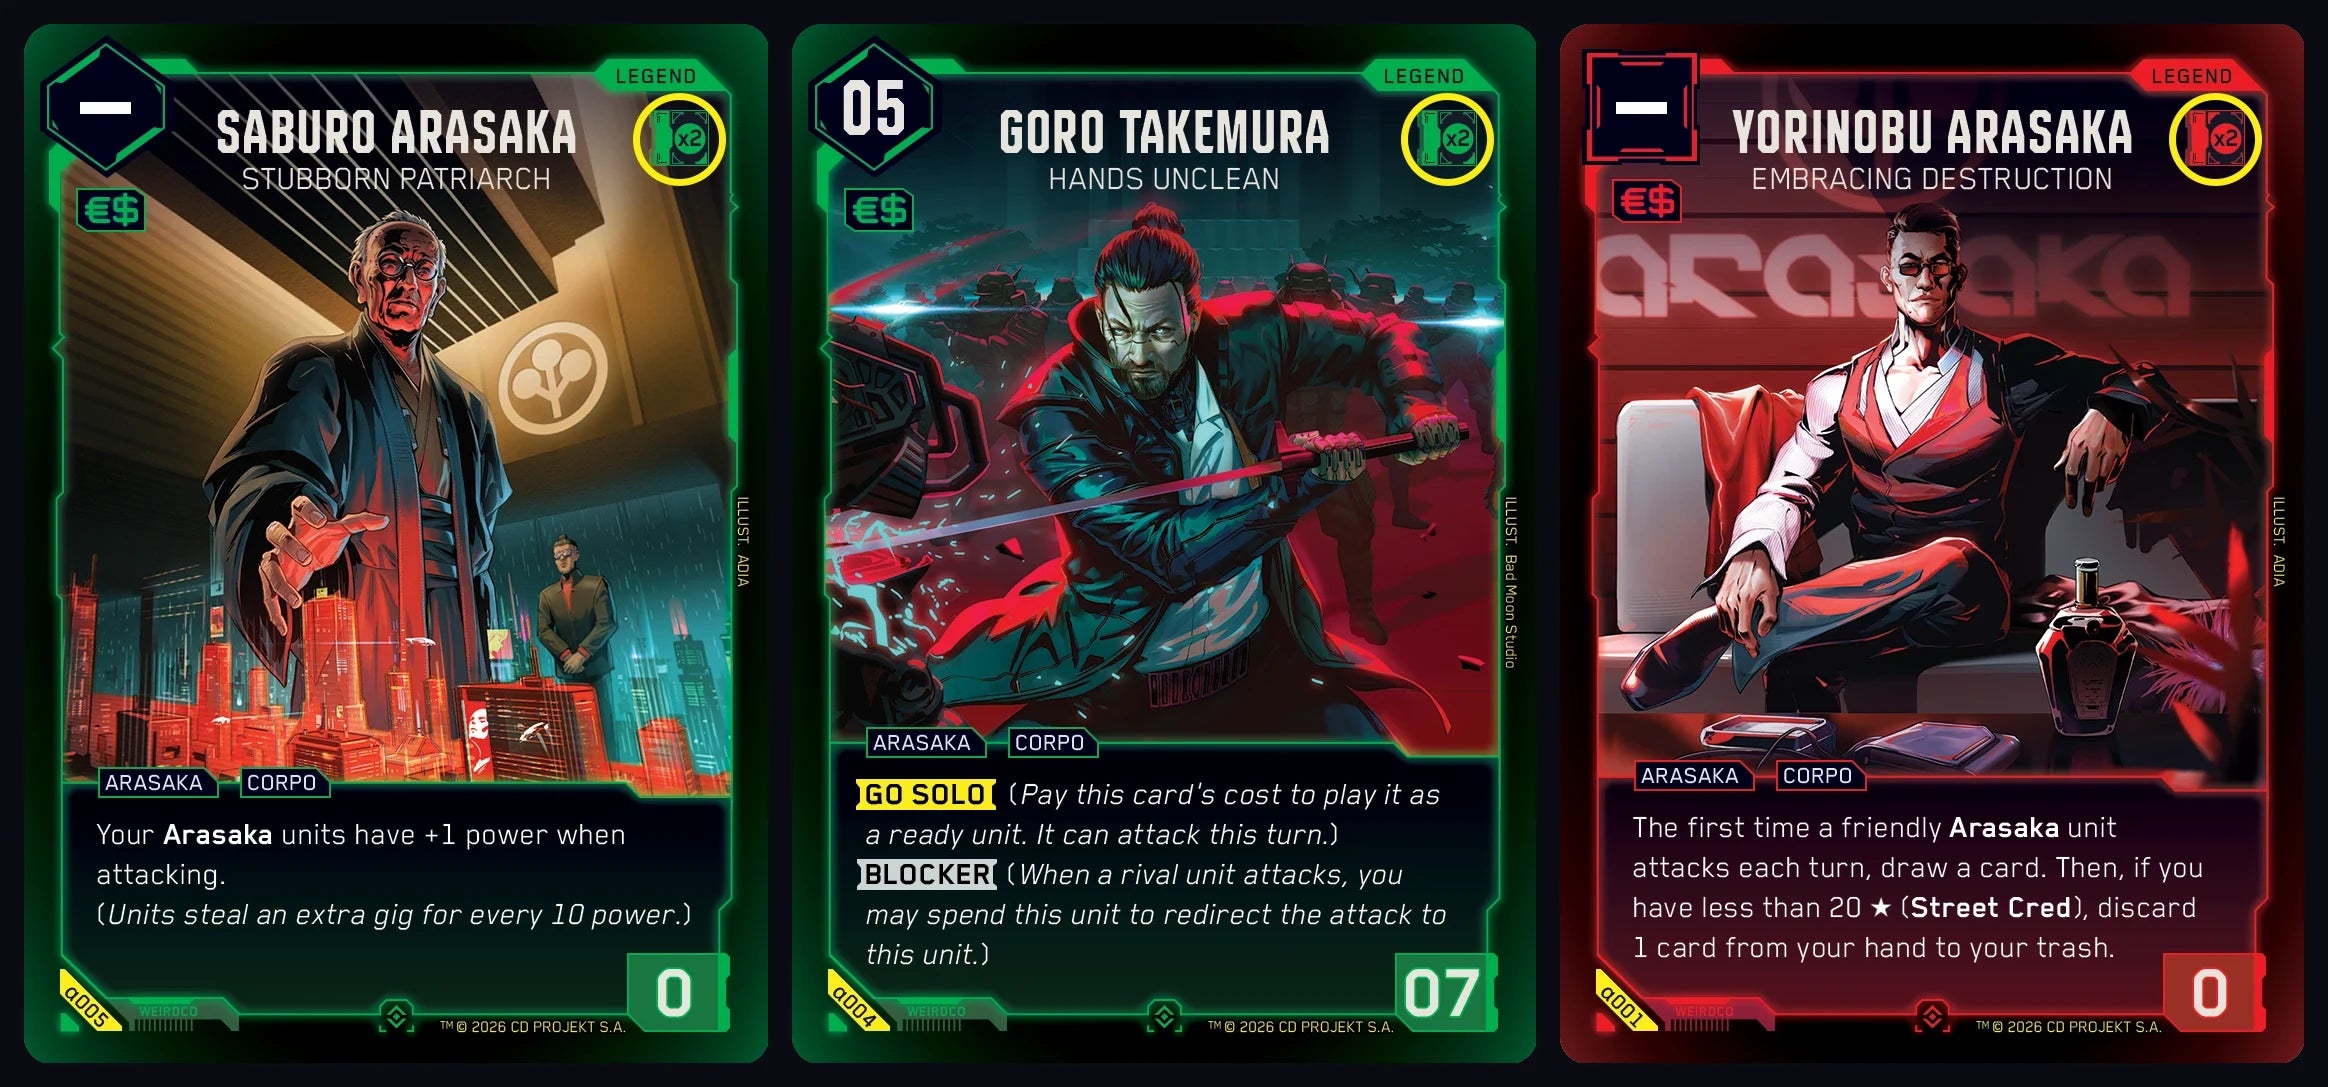
Saburo Arasaka, Goro Takemura and Yorinobu Arasaka — three Legends from Set 1
ℹ️ Card Text Beats Rules Text
If a card's ability text ever contradicts the general rules, the card wins. That's standard for nearly every TCG, but worth flagging early because Cyberpunk has a lot of effects that bend or break the defaults.
Setting Up the Game
Setup takes under a minute once you've done it once. Here's the routine:
Shuffle & Place
Shuffle your three Legend cards and put them face-down in your Legends Area in a random order. Shuffle the rest of your deck and place it in your Deck zone. Pile all six of your Gig Dice into your Fixer Area.
Choose Who Goes First
Roll a die or flip a coin — winner picks who plays first. Whoever ends up going first has to spend two of their face-down Legends (turn them sideways) before their first turn begins. It's the small price you pay for first-strike advantage.
Draw Your Opening Hand
Each player draws six cards from the top of their deck. There's no maximum hand size, so don't worry about discarding excess later.
Mulligan (Once)
If you don't like the cards you've drawn, shuffle your hand back into your deck and draw six fresh ones. You only get one mulligan, so make it count.
Playing a Turn
Every turn flows through three phases in the same order: Ready, then Play, then Attack. Once you've got the rhythm, turns feel quick and snappy.
1. Ready Phase
Three small steps in this order:
- Draw a card — top of your deck into your hand. If you can't draw because the deck is empty, you lose on the spot.
- Gain a Gig — pick any die from your Fixer Area (except the d20, which has to be taken last), roll it, and place it in your Gig Area with the rolled value showing.
- Ready your spent cards — turn every sideways (spent) card back upright. Units that attacked last turn are ready to swing again, Legends spent for Eddies come back online, and so on.
2. Play Phase
This is the "do stuff" phase. You can take these actions in any order, as many times as the rules allow:
Sell for Eddies
Once per turn you can sell cards from your hand. Pick any cards with the Sell Tag (€$) symbol, reveal them to your rival, and put them face-down in your Eddies Area. Each one is worth one Eddie when you spend it later — it doesn't matter how expensive the card was originally.
Call a Legend
Once per turn you can pay 2 Eddies to flip one of your face-down Legends face-up. Don't peek at them first — the random order is part of the bluff. Calling a Legend triggers any FLIP abilities on that card immediately.
Play Cards
Pay the Eddie cost shown in the top-left of any card and put it into play — Units onto the Field, Gear attached to a Unit, Programs straight into the trash after resolving. Remember: spent Legends can also be used to pay one Eddie towards a card's cost.
⚠️ Common Mistake
Units can't attack on the turn they're played — that's standard summoning sickness. The exception is the GO SOLO keyword: pay the listed cost and the Unit comes in ready, able to swing the same turn.
3. Attack Phase
Time to send the crew in. There's only one thing to do here: declare attacks with your ready Units. Each Unit attacks individually and you fully resolve one fight before the next begins. We've broken the whole thing down in the Combat section below.
Combat in Depth
Combat is the heart of Cyberpunk TCG and works a bit differently from most other card games. There's no traditional blocker phase — instead, you pick a target with each Unit, then your rival reacts.
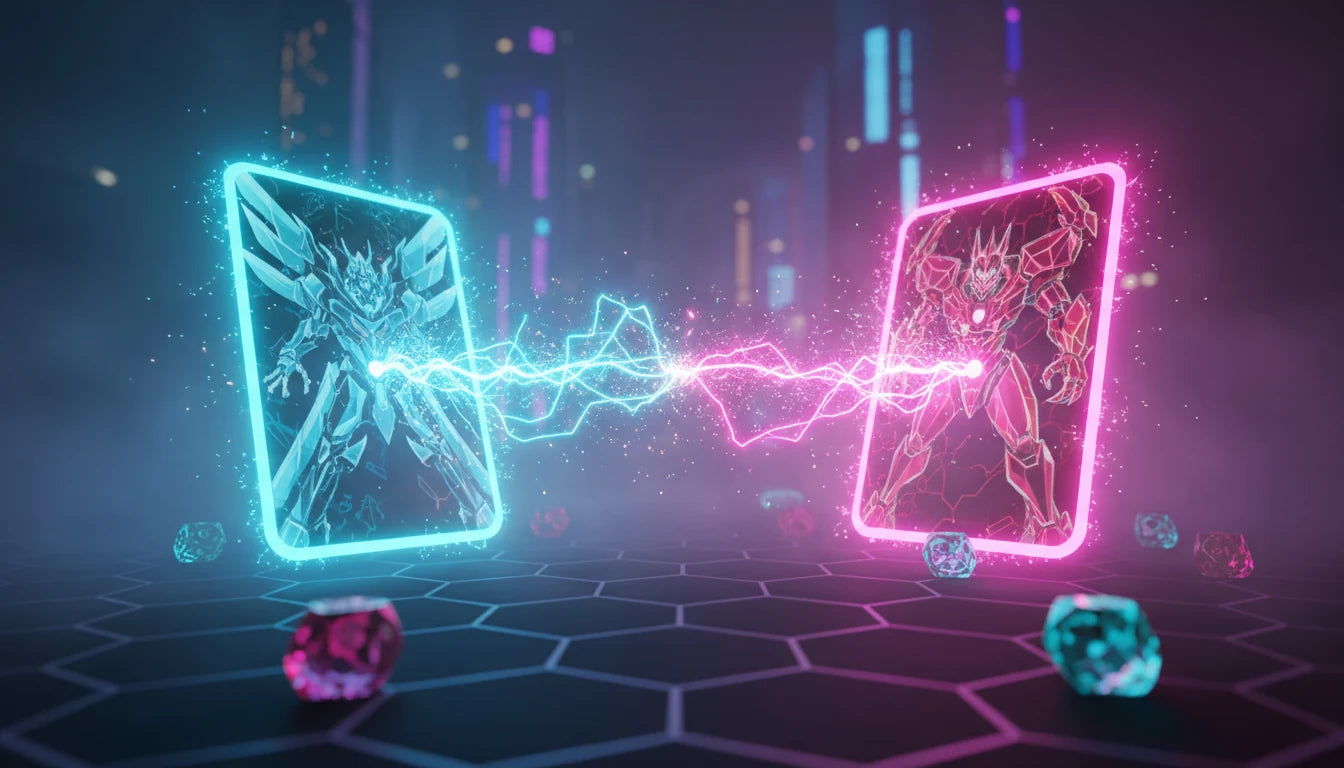
Combat — pick a target, resolve the fight, repeat
Choose Your Target
When one of your Units attacks, you pick one of two targets:
- A spent Unit on the field — start a fight to wipe it out.
- The rival player directly — if it lands, you steal a Gig Die from their Gig Area.
ℹ️ Ready Units Are Untouchable
You can only attack a Unit if it's spent (sideways). Ready Units are protected — the only way to swing at them is to bait out a BLOCKER, which redirects an attack from the player onto a ready defending Unit.
Attacking a Spent Unit (a Fight)
- Offensive Step — spend your attacking Unit and trigger any ATTACK abilities on it.
- Defensive Step — your rival can Call a face-down Legend, or use a BLOCKER Unit to redirect your attack onto a ready defender.
- Fight — compare total Power. The Unit with more Power wins. If they tie, both sides lose.
- Defeat — every defeated Unit (and any Gear attached to it) goes straight to the trash.
Attacking the Rival Directly
- Offensive Step — spend your attacking Unit and trigger any ATTACK abilities, same as a fight.
- Defensive Step — your rival still gets the chance to Call a Legend or redirect with a BLOCKER.
- Steal — if the attack lands, pick one Gig Die from their Gig Area and move it to yours. The face value comes with it.
💡 Power 10+ Steals More
For every full 10 Power on the attacking Unit, you steal an additional Gig. A Power 10 Unit nicks one extra die (two total), a Power 20 monster grabs three in a single hit. Stack Gear on a beefy Unit and the math gets nasty fast.
⚠️ Blocked Attacks Steal Nothing
If a BLOCKER soaks an attack that was aimed at the player, no Gigs change hands — even if the BLOCKER itself loses the fight. Use them wisely: trading a Unit for a Gig Die is almost always worth it.
Deck Building & RAM
Once you've played a few games out of a starter, you'll want to start tinkering. Here are the rules of construction:
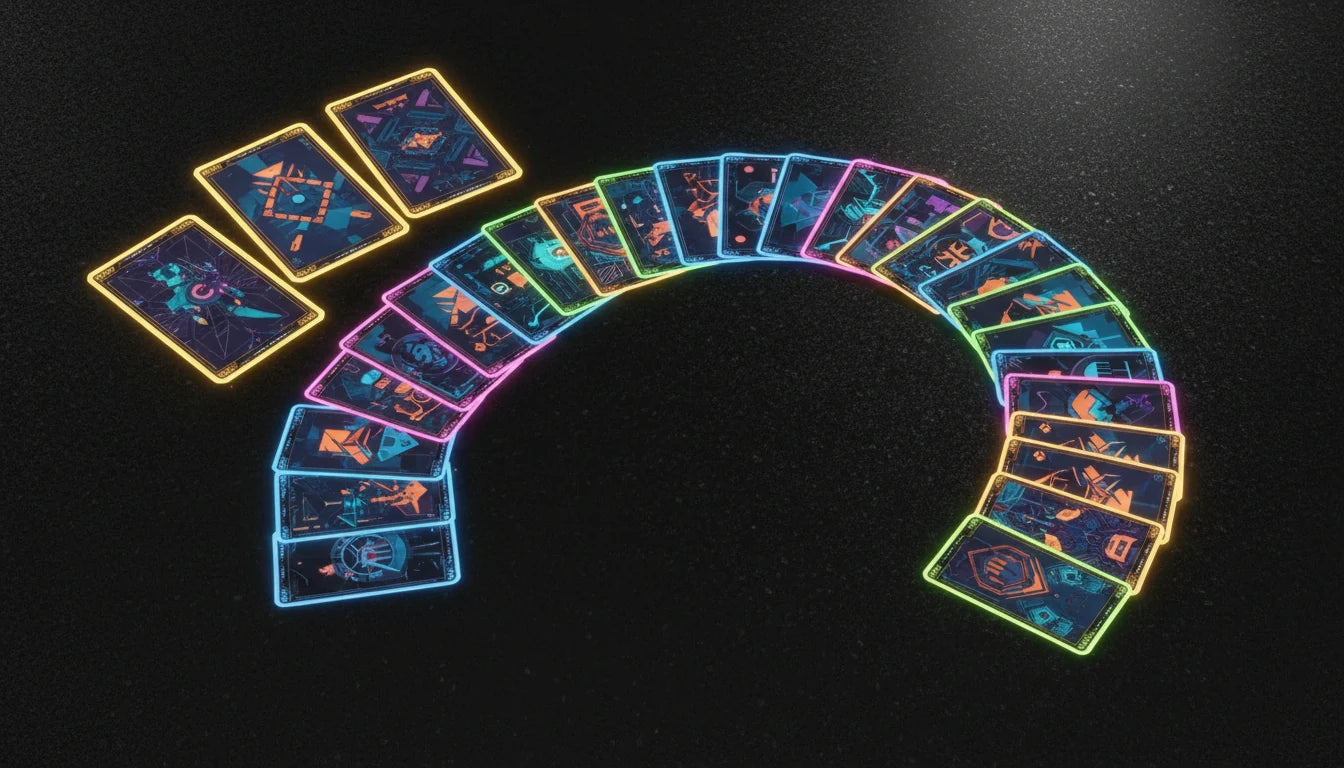
A complete Cyberpunk TCG deck — three Legends plus a 40–50 card main deck
- Exactly 3 Legends — each one with a unique name. They sit separate from your main deck.
- 40 to 50 main-deck cards — anywhere in that range works, so you can tune for consistency or variety.
- Maximum 3 copies of any card — same name, max three.
- Stay within your RAM limits — every Legend has a coloured border with a RAM value. Add the RAM values across your three Legends and that's your maximum for each colour in the main deck.
How RAM Works
Every card in your main deck has its own RAM value in one or more colours. The total RAM-per-colour of every card in your deck has to be less than or equal to the combined RAM of your three Legends in that same colour. If you want to splash a second colour, you need at least one Legend that supplies that colour's RAM.
💡 Beginner's Shortcut
Start from a pre-built starter and only swap a few cards at a time. The RAM system makes radical rebuilds harder than in most TCGs — small, deliberate tweaks teach you more than starting from a blank page.
ℹ️ Alpha Kit Note
If you've picked up an Alpha Kit, those decks are designed as a closed experience — you grab one of the two pre-built decks and run with it as is. Custom deck building proper kicks in with the Set 1 release.
Glossary
Quick-reference for the terms that show up over and over in the rules and on cards:
| Term | What It Means |
|---|---|
| Spend / Spent | Turning a card sideways. Spent cards can't be spent again until they ready up at the start of your next turn. |
| Ready | A card sat upright. Only ready Units can attack, and ready Units can't be attacked. |
| Eddies | Short for eurodollars. The currency you spend to play cards. Earned by selling cards from your hand. |
| Sell | Once per turn, place cards with the €$ symbol face-down in your Eddies Area. Each becomes 1 Eddie when spent. |
| Gigs | The jobs your crew completes, represented by Gig Dice. First to start a turn with 6 of them wins. |
| Street Cred (☆) | The total of every face value showing on your Gig Dice. Some cards trigger off it. |
| Fixer | The middleman who lines up your jobs. Holds your Gig Dice at the start of the game. |
| Legend | A named member of your crew, three per deck, all face-down to start. Can be spent for 1 Eddie or Called for 2. |
| Call a Legend | Pay 2 Eddies to flip a face-down Legend face-up, triggering its FLIP effect. |
| BLOCKER | Keyword. Spend this ready Unit to redirect a rival's attack onto it. |
| GO SOLO | Keyword. Pay the listed cost and the Unit comes into play ready — it can attack the same turn. |
Top Tips for New Edgerunners
Don't Hoard Eddies
Eddies sitting idle aren't winning the game — Units on the Field are. Sell early, spend hard, and keep the pressure on. Every leftover Eddie at end of turn is a wasted opportunity.
Time Your Legend Calls
You only get one Call per turn and it costs 2 Eddies — don't waste it on a dead moment. Wait until you can chain a FLIP trigger with another big play, or until your rival's overcommitted to defence.
Save the d20 for Pressure
You're forced to take the d20 last, but the upside is huge — it's worth massive Street Cred and it's the juiciest target your rival can steal. Make sure you've got Blockers ready when it lands.
Keep a BLOCKER Up
A single BLOCKER on your field can save you a Gig Die at a critical moment. If your rival has a Power 10+ Unit ready to swing, an empty board can cost you the game in one attack.
Watch Your Deck Size
Decking out is a real loss condition. If you're playing a fast deck that burns through cards, count what's left and don't let yourself run dry. Sometimes the right play is to slow down.
Frequently Asked Questions
Ready to Hit Night City?
Browse our Cyberpunk TCG range — pre-orders, starter decks and the latest releases.
Shop Cyberpunk TCG